Coloured Light with Photoshop
Well since I can't get enough of Other-Nuu atm, I'll do another little tutorial with this girl. :P This time I'm going to fool around with colouring the picture with a Gradient Adjustment layer.
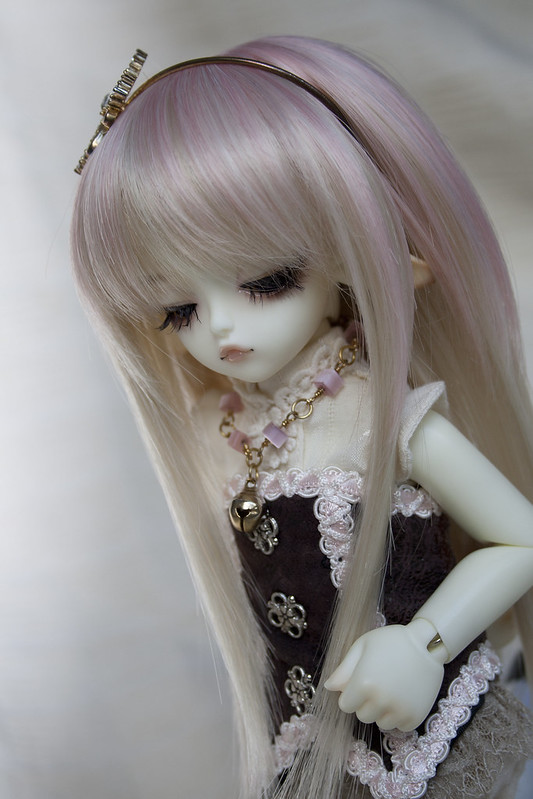
Here we go, the unedited (except for sizing) picture. I have done this with different kinds of photos, but I think you'll get the neatest results with a photo, where the light is hitting the doll slightly from the side. I have used indirect flash for mine, putting a small hand mirror at an angle directly in front of the camera's flash, so that the light bounces off from the wall/ceiling. Here the flash bounces back to light the background instead of the doll, which goves me a nice pool of light to use.
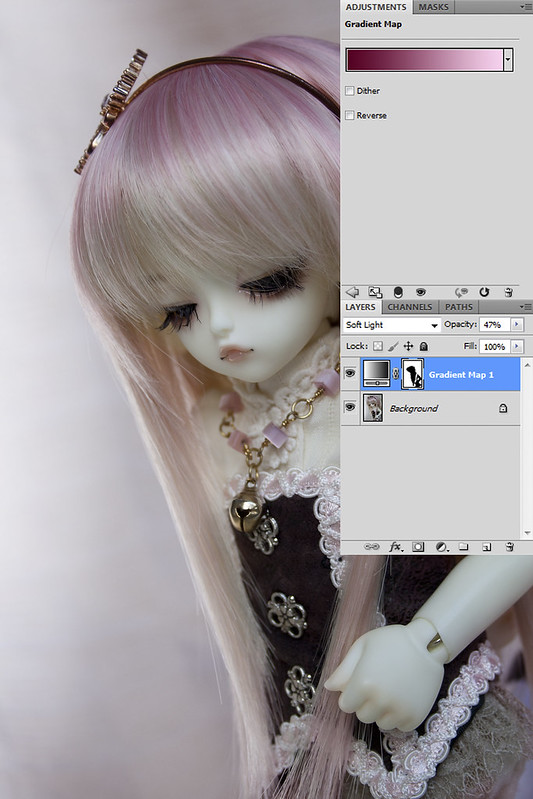
Now, I want to bathe her in pink light. First step: add pink. I added a Gradient Adjustment layer, from dark pink (#530022) to light pink (#f6d2ed). You might go for slightly different shades, just take something dark (can be even black if you want) to something light, but not too light so that it is almost white. Then, set that layer's blend mode to Soft Light and turn down the opacity to your liking. I set for 47% for mine.
Now, I don't want all of her to be pink, I just want a suggestion of a pink light. So I have to erase excess pinkness from her face, and other objects I want to retain their original colour. So I click on the white rectangle next to the Gradient layer (layer mask) and choose a black brush with 0% Hardness and of appropriate size. I then paint over the dolls's face, and in this case, the corset and hand.

Second step: enchance that the light is pink. I do that by adding a Color Balance adjustement layer. I only edit the highlights, so only the lightest areas of the photo are affected. Since I want pink, I turn the levers towards magenta and red.
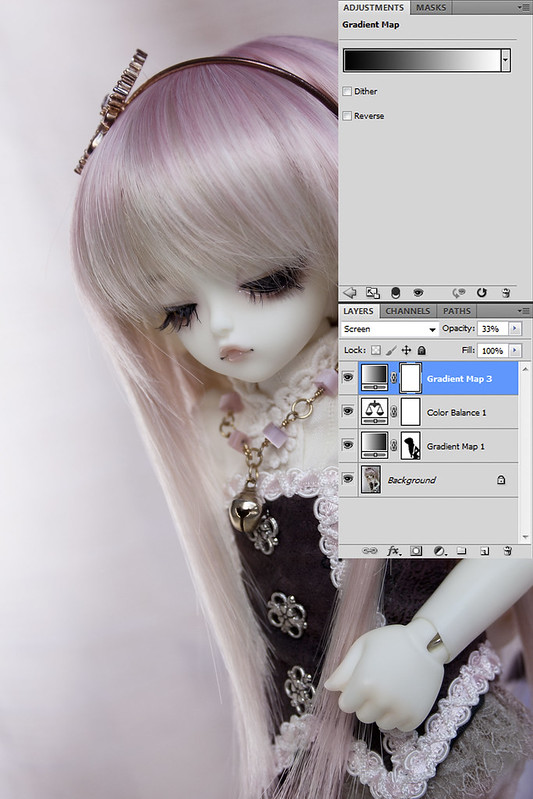
Then I just want to tweak the overall lightness. First I do a B&W Gradient Adjustment layer, set to Screen and opacity of 33%.
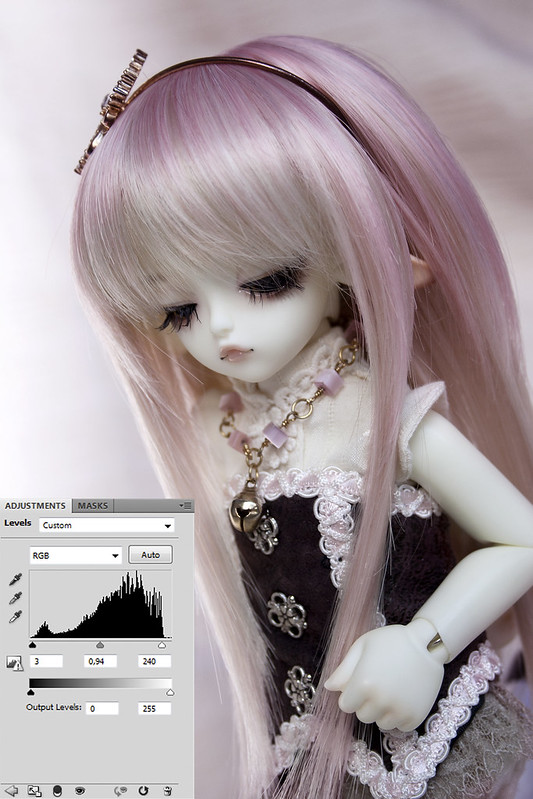
Then I tweak with a Levels Adjustment layer. I've slided the highlights lever slightly to the left, and the midtones to the right. Also, just a bit of shadows to the right.
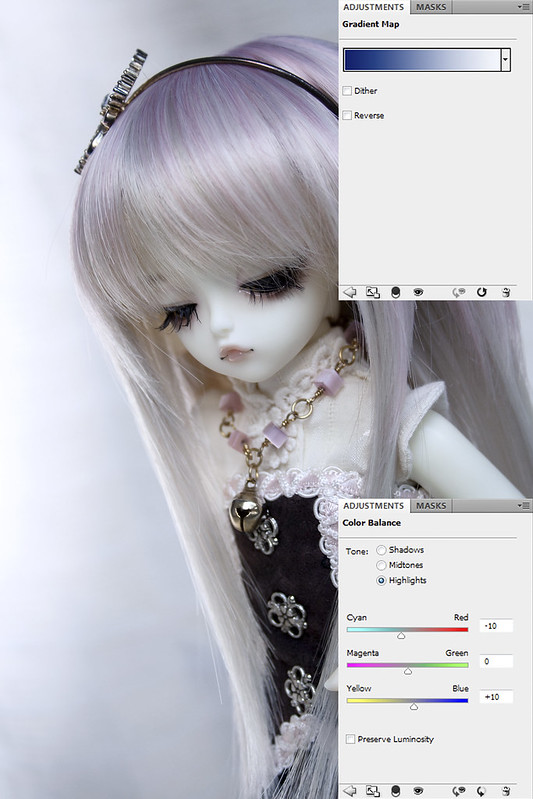
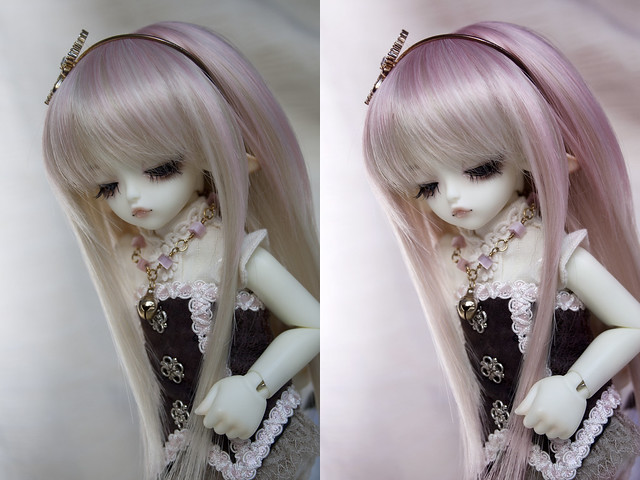
Now to show I could have done this with any colour. In this version everything else is the same, except now the coloured gradient is from dark blue (#001d67) to light blue (#dde0e7) and I've tweaked the Colour Balance layer to add cyan and blue to highlights instead of the magenta/red. (Btw, that blue gradient is a keeper. I use it to counter yellow photos. Just set it to Soft Light and turn the opacity down enough.)
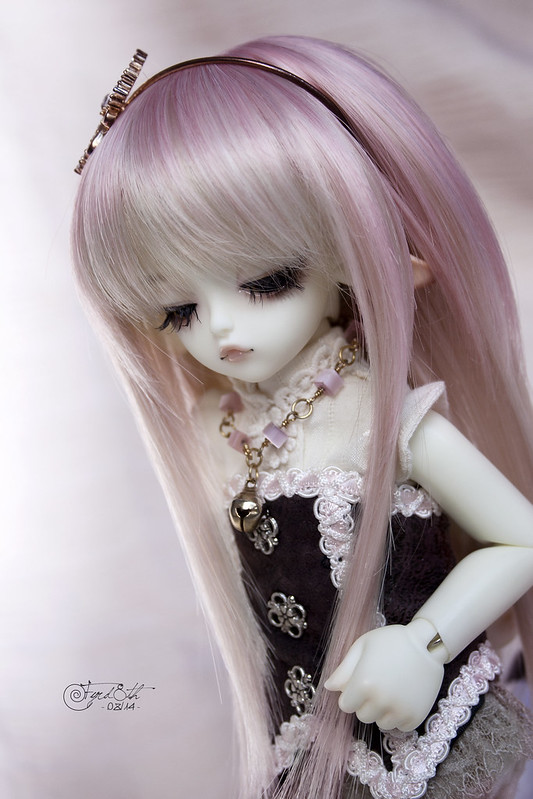
But let's go with the pink now, since it looks so nice with this doll :3

That's a nice final result, the picture doesn't look over photoshopped, it just gives the right amount of editing. I'm very lazy with that, I tend to upload pictures almost as I took them (sometimes I make them a bit brighter and that's it). I'll definitelly try more things, you have some nice ideas around :)
VastaaPoistaSadly, I can't see the last picture, I wonder why. I'm surious about what it is :P
Thanks for the notice, I fixed it now. I have no idea why the link broke...
VastaaPoistaAnd I must say, I should always strive towards taking better pictures just off the camera. It would make me a better photographer. But I just love love love Photoshopping, so that's why I always go for the filters in the end. :D I can sometimes spend hours editing photosets and doing comic panels and so forth.