Dreamy Effect with Photoshop
Due to popular demand :P , here is the tutorial how to do the 'dreamy effect' I use often in my photos.

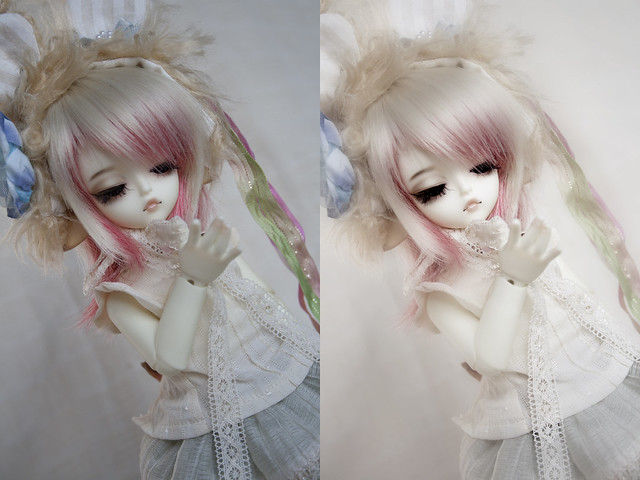
So here is where we start. To use this method to the fullest, I suggest using a photo with very light colours. No stark shadows and little colours all in all. I have already resized the image and cleaned it up (see previous tutorial) so we are ready to go!
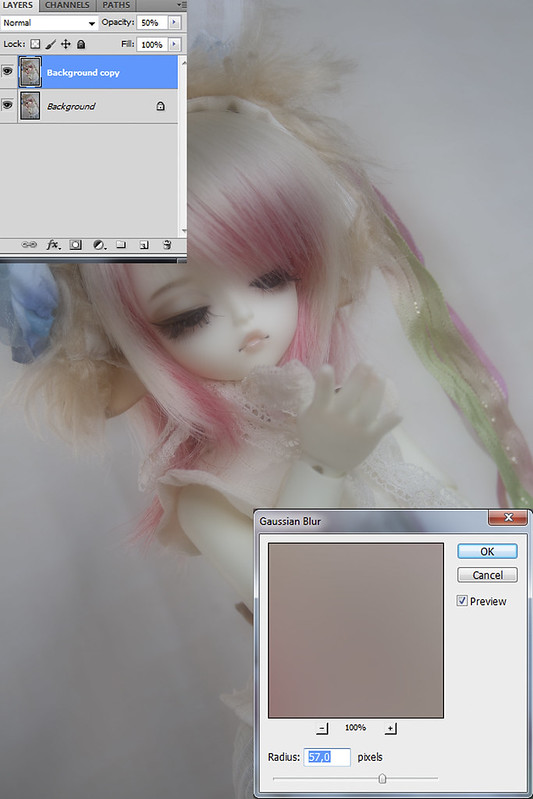
First, duplicate the Background layer so you have two exactly the same pictures on top of each other. Then select the top layer (Background copy) and turn Opacity to 50%. Now go to Filter-menu, then go to Blur -> Gaussian Blur. Then the amount of blur you need depends on the size of your photo. I settled on 57px for this photo. You don't want the blurred layer to look too much like a total smoke screen (if the pixel-count goes too high) nor do you want the shadows to be too prominent (if the pixel-count is too low). Slide that slider until you get an effect something similar to this photo. Btw, if you need more of the blur intensity, or less, you can simply tune the opacity of the Background copy -layer. I normally use something between 30-60%, but I always start from around 50%, so that I can see how much Gaussian Blur I need in the first place.
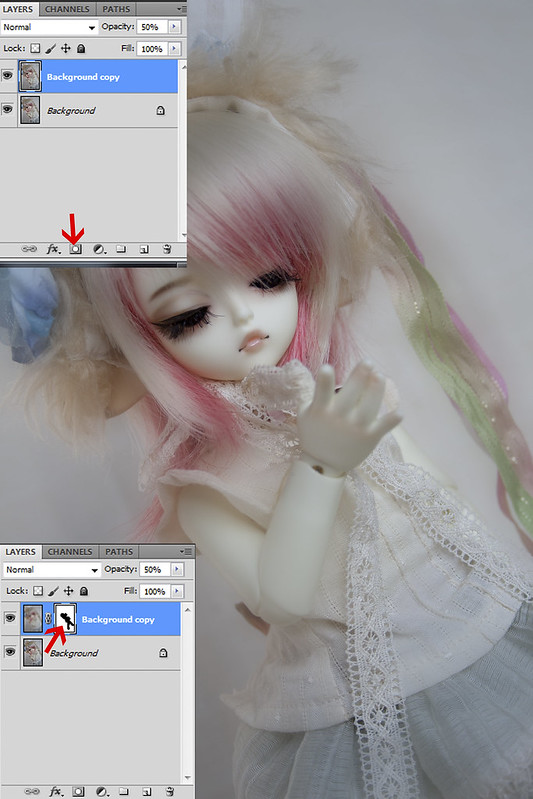
Now I don't want all of her face to be so blurry, so I need to mask out some of that blurred layer. Make sure you have the blurred layer selected, then click on the Add Layer Mask icon in the bottom. Click on the white rectangular that has now appeared next to the Background copy. Select the brush, hardness 0% and size suitable to nicely paint the are of the doll's face. Then make sure you have Black as the painting colour and brush over the dolls face and other objects in the photo you want un-blurred. I usually unblur at least the face and any jewellery the doll has. In this picture the doll's hand is pretty porominent feature of the photo, so I unblur that too.
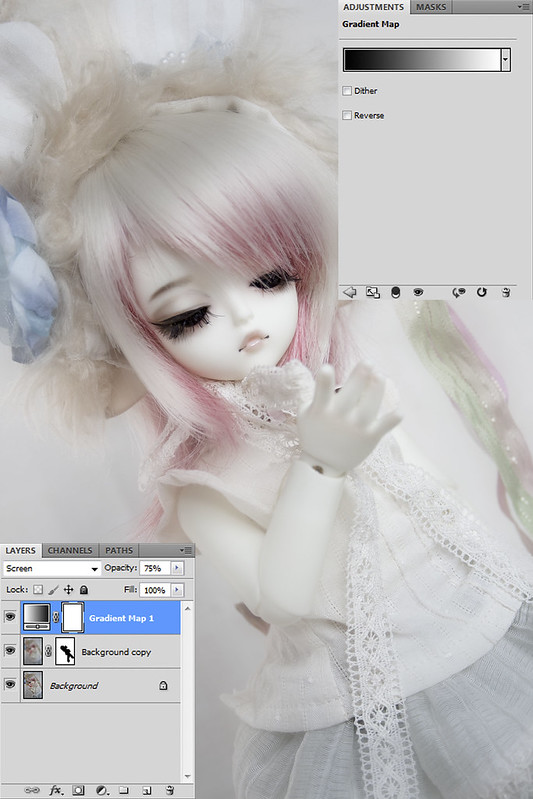
Now it's time to bring in the whiteness! Add a Gradient Adjustment layer and select black/white gradient. Then turn the blend mode of that adjustment layer to Screen. Turn down the opacity a notch, depending on how well-lit your photo was to begin with. Mine was much darker than I wanted, so I'll leave the opacity at 75%.
Then it's time to do some fine-tuning to that light. So I add a Levels adjustment layer. I actually lighten the midtones a bit (since I want to enchance that dreamy lightness), but darken the blacks a lot, so that the eyes can be seen. Then I add just a bit more of highlights. For some reason, I seem to have forgotten to take a screen shot of this stage, but the method is the same as in Basic Improvements...
Then, because my picture's white balance was a bit on the cold side, I want to bring some warmth to it. You might not need this step if your picture is already the right colour or you might need a completely different coloured gradient that me here, but you can keep this trick in mind if you want to add some 'old feel' or warmer tones to your picture.
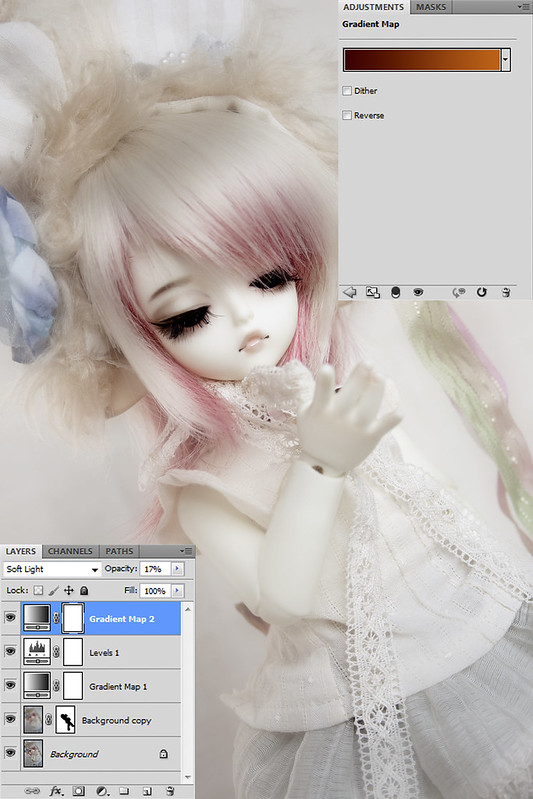
I added another Gradient Adjustment layer. This time I choose a gradient that goes from dark chocolate brown (#3a0003) to warm orange (#bc6200). I actually have this gradient saved, since I use it so much! I also have a gradient to instant-defeat photo yellowness, but that is for another tutorial. Can you figure it out on your own? ;) Anyway, back to this Warmth Gradient (as I call it). Set it's blending to Soft Light, then take the opacity down. I only used 17% opacity in this photo, I sometimes need even less, around 5%. Even little things to the difference! Remember that you can always toggle visibility of the layer to see if the effect is what you need. And honestly, less effect is usually the better. Only if you're going to need a sepia-schemed picture are you going to need a strong opacity for this gradient.
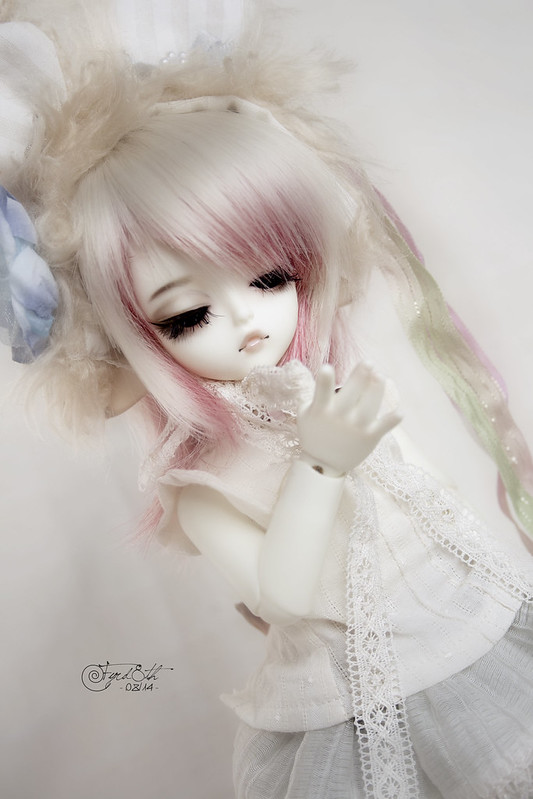
And now we're done! Isn't she sweet? :3
Next up is either the 'darkened photo' (mostly used on every photo of Alex XD) or more uses for the different coloured Gradient Adjustments, like how to give the 'pink light' effect I used a while back with Milki. Or something else! Photoshopped bokeh/snowfall? What do you want to see?

How to make that ??
VastaaPoistaIs there something particular you need more info on? I'll be happy to at least try to explain it more in depth.
VastaaPoistaThank you for the tutorial, I'll be sure to try this out when I have the patience to deal with Photoshop more. ;)
VastaaPoistaAll the options for a next tutorial sound so tempting... Maybe photoshopped bokeh/snowfall? :3 I love bokeh~
Sorry, pink light coming up :D But I'll do the bokeh after that, I promise!
VastaaPoistaAnd I think that your Yumeka or Nia could look absolutely adorable with this dreamy effect :3
Oh, that's allright! I'll look forward to pink light then~
VastaaPoistaYes, I'll have to experiment with this, I've been meaning to take photos of both Nia and Yumeka soon.