Snowfall with Photoshop
It is almost winter, no? Well, it can be in your photos, where you can fake the snow with Photoshop. :D
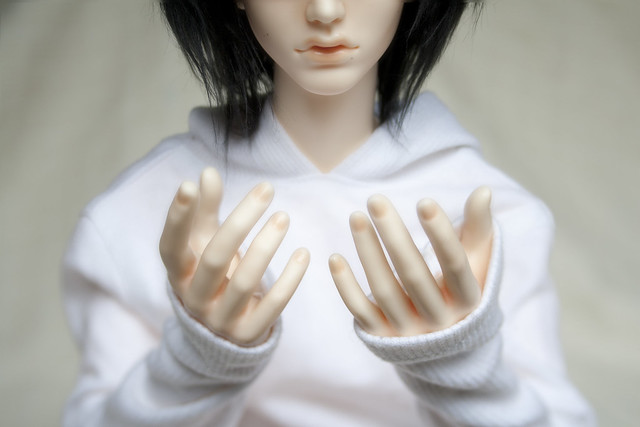
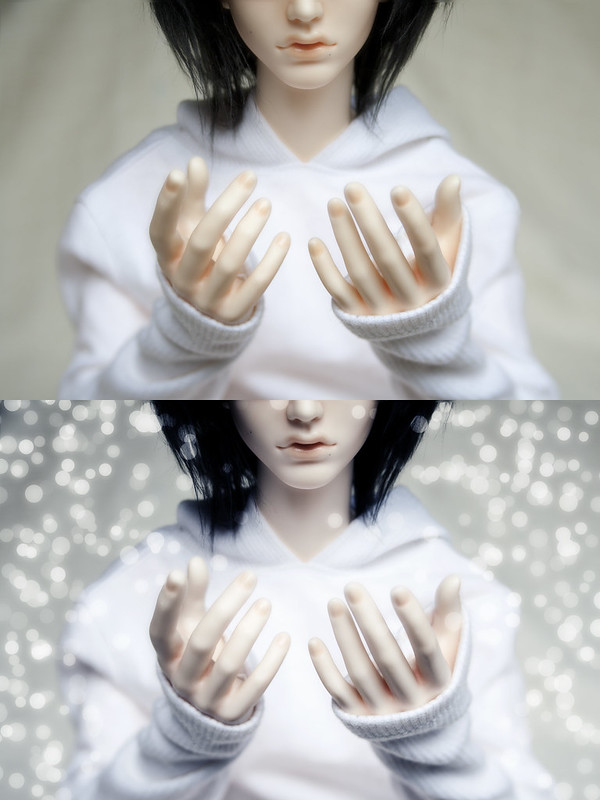
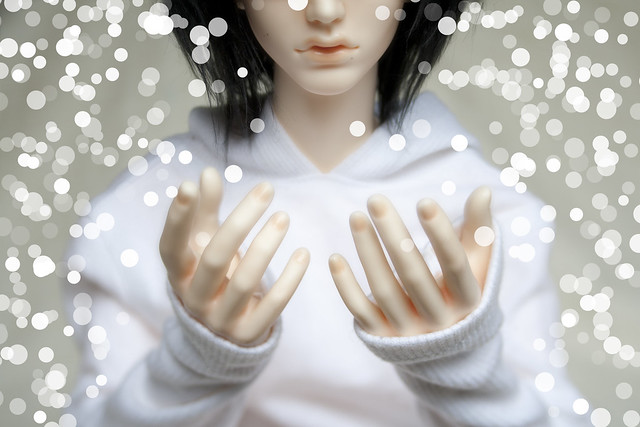
Here is where we start. I decided to go with a very light coloured photo, to really bring out the whiteness of the snow. Actually, the inspiration of this very photo (with only the chin and the upwards turned hands visible) comes from the original opening of Melancholy of Haruhi Suzumiya, where Yuki does this same kind of pose. And well, I'm a Haruhiist and so is Nigel ;)
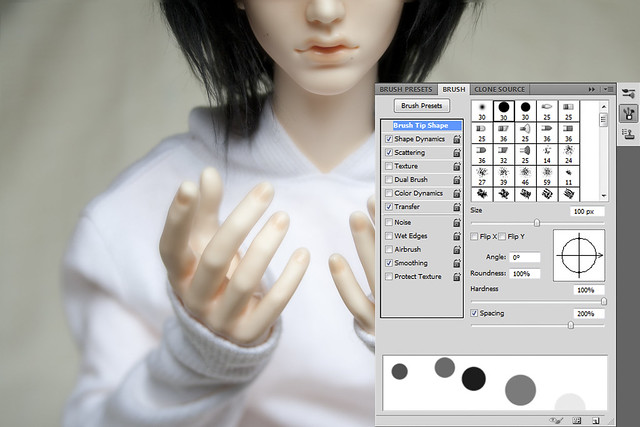
Now for the snow. I use a Brush tool, choosing the basic round brush with white colour. Then I apply the following settings that can all found from the brush-menu.
- Shape Dynamics: set Size jitter to 50%, control off (this will make the 'flakes' varied in size randomly)
- Scattering: Check 'Both Axes' and set to 200% (this will make the 'flakes' spread out more)
- Transfer: Opacity jitter to 90%, control off (this will make the 'flakes' randomly more or less opaque, not setting this to 100% will ensure that every one is still somewhat visible)
Then from Brush Tip Shape (in the screen shot, you can see all the other changes I've done as checked boxes) I set size to 100px and spacing to 200%. Bare in mind that these setting work for my picture of size 3150x2100px, 240res. If your picture is some other size, you might need to adjust these settings, mostly the spacing, scattering and brush tip size.
Then I make a new layer on top of my image. And then I start brushing around the edges of the image, starting from the top corners. Don't do all of it in one sweep and don't go over the same places twice! If the scattering sends some snowflakes to somewhere you don't want them, you can take the eraser and just sweep them off. If the snow doesn't look good at all, delete the layer, tweak the brush settings if needed and do it again. I usually do not brush over the doll's face, but go with what your picture needs.
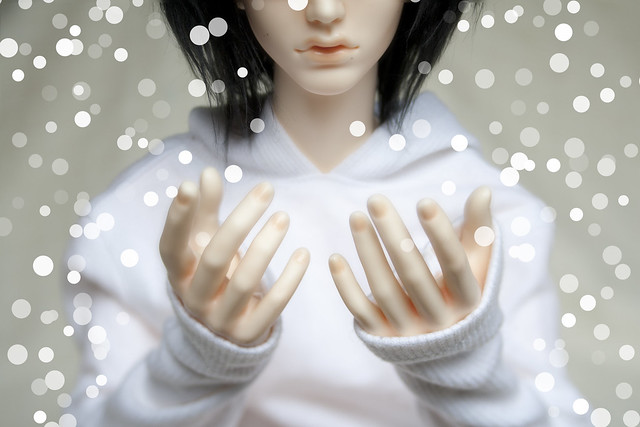
After doing one layer of snow, and if you want more of it to some parts, then add another layer and repeat. I have made another layer, putting more flakes to the edges of the picture, as is usually the case.
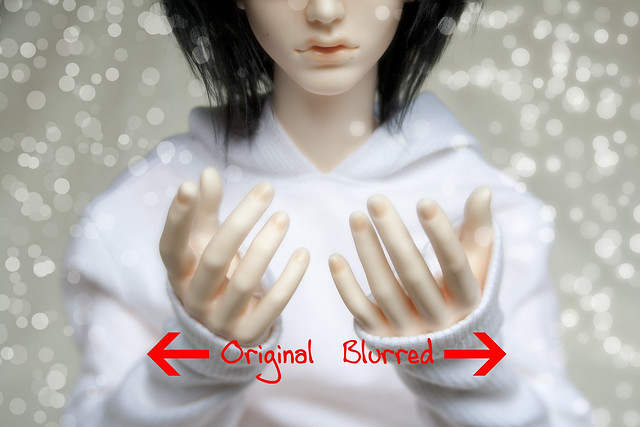
Then, I turn every snow-layer to Soft Light. Then, I duplicate each snow-layer and use a Gaussian blur on the copies. You can see what the blur does above. I used a blur of 20% on mine, but go for something that gives your flakes a nice soft glow. You can also tweak the opacity of the layers as suits you. I recommend not leaving more than one original layer to full opacity, and turn the rest down. In here, I've left the top-most layer (with fewer flakes) to 100% and turned the lower layer to 50%. But I've left both blurred layers to 100%.
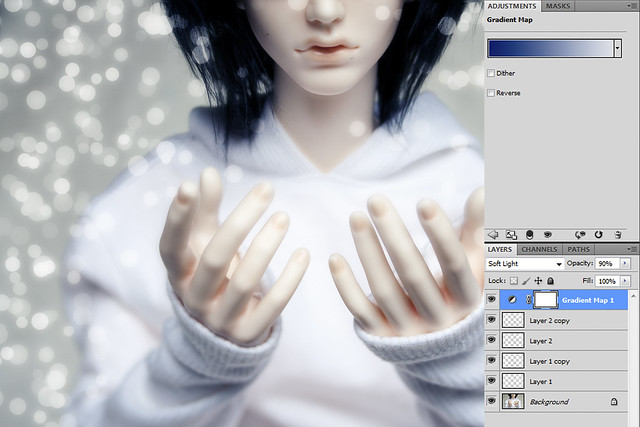
Now I just need to adjust the rest of the photo. I want to give mine a cold look and to get rid of some of that green. Now I use my trusted blue gradient mentioned in my previous tutorial, that I've saved as "Cold" gradient, quite fitting for this photo ;) I set the Gradient layer to Soft light and turn down the opacity just a notch, to 90%. you might, of course, use something else. The important thing is that the photo is coloured to your liking. Use Color Balance, if needed.
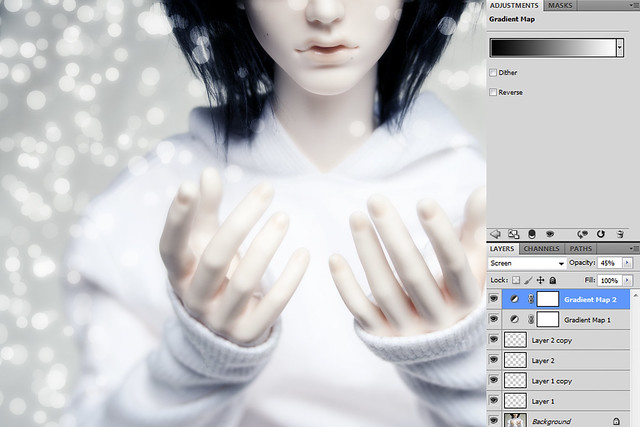
Now I want to make that white pop. I use another trick alreadu covered in my tutorials, using a B&W Gradient Adjustment layer set to Screen. I used Opacity of 45%, although I was really, really tempted to leave it even brighter...
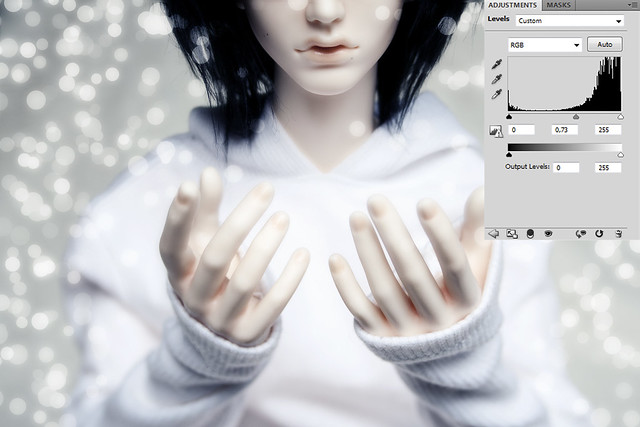
And then I take it back, using a Levels Adjustment layer XD I slid the Midtones and shadows to the right, making the darker areas more dark.
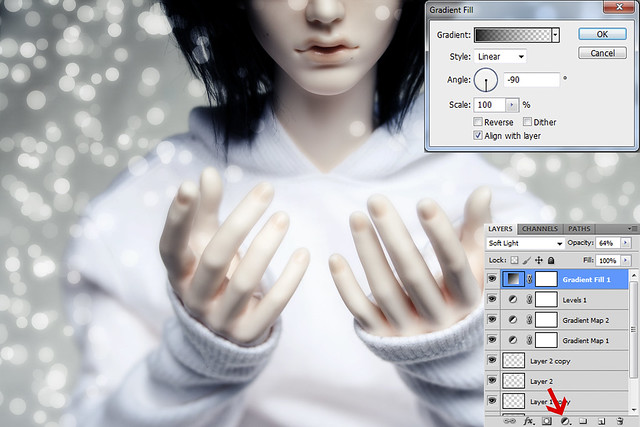
I want to make the face even darker, so that the snow-catching hands really stand out. So I use a Gradient Fill (not to be confused with Gradient Adjustment) that can be found clicking the B&W corcle icon at the bottom and then choosing the gradient. I choose a Black to Transparent gradient and set the angle to -90 so that it goes from top to bottom. Then I set it to Soft Light and turn the Opacoty down to 64%. Mind you, you can do the same with a free gradient as well, just adding a new layer on top of the other and then drawing a Black to Transparent gradient to it. I just knew I needed a fully horizontal gradient going from top to bottom, so this was slightly easier for me.
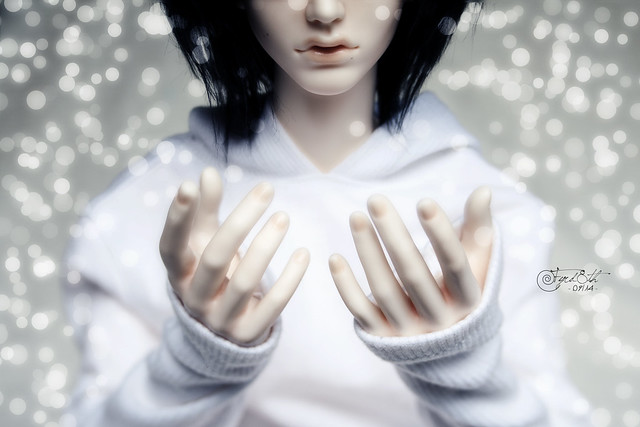
And this is the end result!
Now, you can use the same kind of brush to make different coloured spots on your photo. I have used pink, yellow, blue... But for full effect it needs an added setting of Colour Jitter, so if needed, I'll do another tutorial of it later. You can also use a different brush tip shape, for instance if you want to make falling stars or hearts. Only in this case, you need to set the Angle jitter too (much of jitter for stars, less than 50% for hearts, if you want them to fall somewhat the right way up). Happy testing!

That's a very pretty effect!!! Here is almost spring (today is raining like mad though T_T), but since there's no snow where I live in winter, and december is VERY summery, I think I might try this for a white christmas photo XD!
VastaaPoistaThanks for the tutorial! :)
I'll be looking forward to seeing your snowglobe pictures :)
VastaaPoistaWe usually have quite the winter here, snow on X-mas and all. But it means that it is also awfully dark from September to April, so we need to time taking photos very well. Or use artificial light. I know I have been planning to buy some good spotlights for ages.