Fake Bokeh with Photoshop
Ok! Today we'll venture into the world of faking bokeh with Photoshop brushes. It is a fun effect on your photos, and once you get the hang of it and can use it on all kinds of backgrounds, it is very versatile. The only thing to remember is to reel yourself back since otherwise you might end up with just overdoing it XD

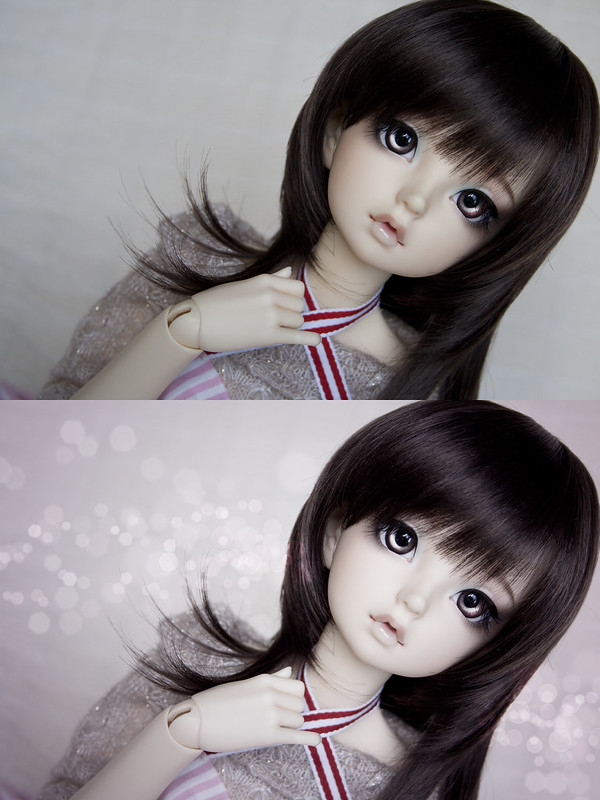
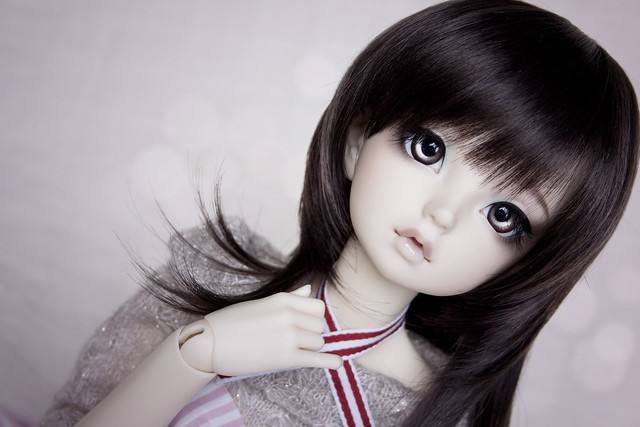
Here is where we start. I've already resized the image, done the basic cleanup and used Dodge on the eyes. For this first tutorial I've chose the "easiest" type of photo to do bokeh glittering on, a simple one with a light-coloured background. For the bokeh to really show up to its best, it is also recommended that the photo have 'negative space' meaning ample space between your photo's subject and the photo's edges. So this is also a nice incentive to play around with new photo compositions, at least for me who usually takes very close portrait photos with very little breathing space...
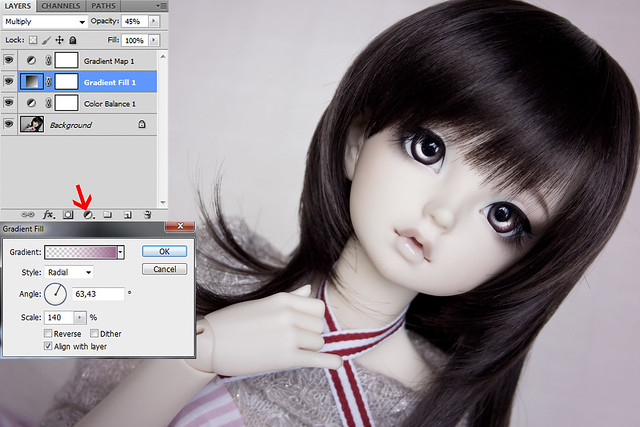
This time I want some colour on the photo though, so I have edited the photo to my liking using mostly the same methods as done in my previous tutorials (basic and dreamy effects). I've used Colour Balance Adjustment to make the whole thing less green and more magenta. I'm not going into details of the actual settings, since this depends so much on your own image. Then I want to add more pink around the edges. So I make a Gradient Fill layer where the gradient goes from transparent to pink (I chose #98648a for mine) as a radial gradient. I then set scaling and angle to make most of the face visible. To finish up I set the blending of this new layer to multiply and lower the opacity to 45%. To top it off I have also to added lightness to the photo using a b&w Gradient Adjustment layer, set to Screen and 62% Opacity. Result: nice pinkish image.
Now, first up we need to do a brush for the bokeh effect. You can also download these, but since making one is very simple (and useful for other projects), I'll go over it now.
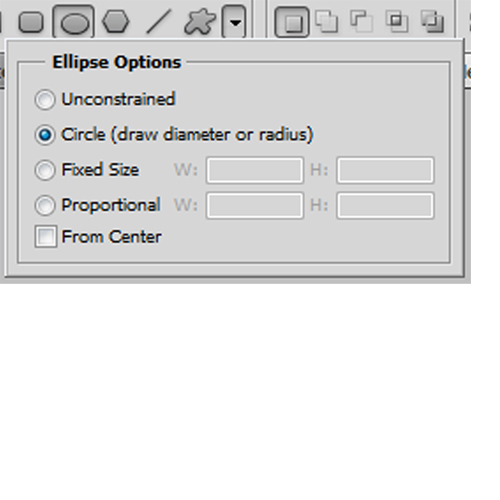
Make a new PS file. (Well, you can also do these steps on top of any PS file, but I like to keep things neat and hence always make a new file :P ) I used a 500x500px with 200 res, but the size doesn't matter, as long as it is big enough to make crisp edges. Then, choose the Ellipse tool and set it to make a perfect circle. Set the colour to black.
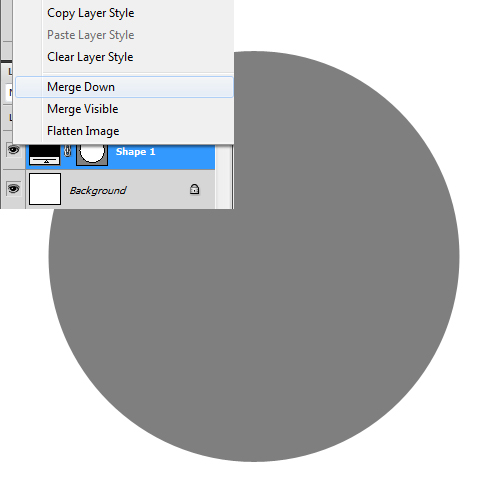
Draw a circle that doesn't fill the whole area. Position the circle around the center, if it wasn't there to begin with. Then, lower the opacity of the shape to 50%. And finally, right-click on the shape and choose the Merge down.
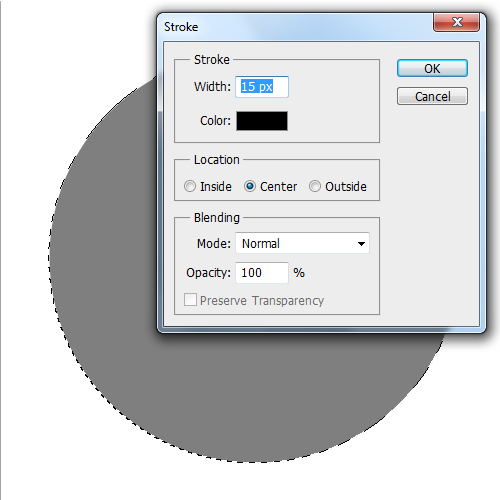
Now with the Wand selection tool, select the light grey circle as a selection. Go to Edit menu and click on the Stroke option. Make sure the colour is fully black. For this size circle I chose 15px wide stroke, you might need to do some trial and error to find a suitable size. Alternatively, you might do brushes with several different stroke sizes, to use for different size bokehs if you find yourself in need of them. This size has worked so far for me for the images I use.
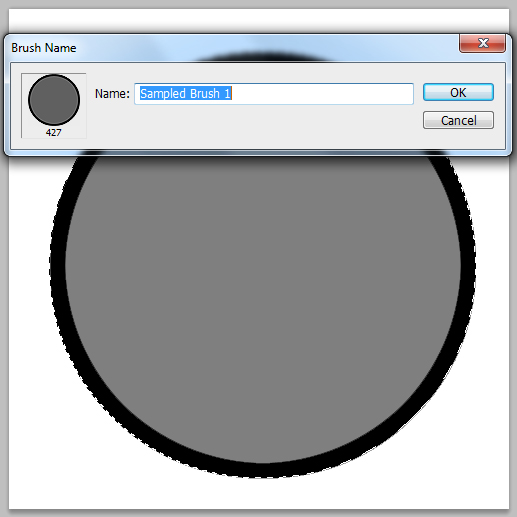
Then take the Wand selection tool again, and select all of the black ringed grey circle. You might need to choose the Add selection option from the top menu and then just click first on the black ring and then on the grey circle. After the full circle is selected, go to Edit menu and choose Define Brush Preset. You might want to rename the brush to something like "Bokeh circle brush" or something if you want to keep things tidy. And then you are done! You now have a circle brush that has a lower opacity center than the edges.
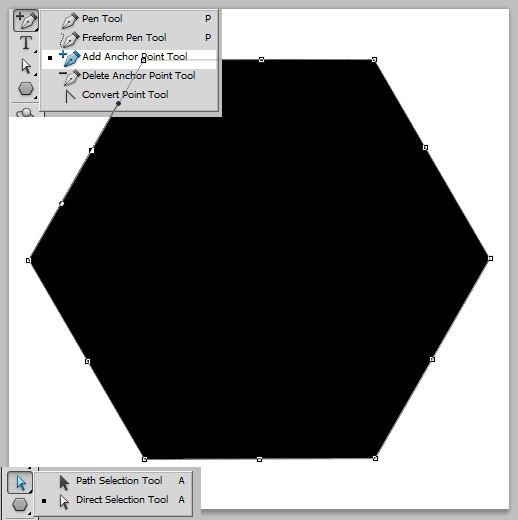
You can do any other shaped bokeh brushes as well. The other one I have personally used is a polygon bokeh. For this one you choose the Polygon shape tool, choose the amount of sides you want (I made a hexagon here, but I also have a pentagon). Again, center the shape and rotate it to make it somewhat level. Now, you could just continue here like with the circle, but I like the sides to be slightly rounded.
So I choose the Add Anchor Point tool and click to the center of each of the six sides. Then I use the Direct selection tool and the click and drag each of those new anchor point slightly outwards of the polygon. Just a few millimeters will do the trick!

Then it's just redoing all the steps like with the circle brush, take the opacity of the shape down to 50%, Merge Down, select shape, Edit -> Stroke with black, select the whole thing, Edit -> Define Brush Preset.
Now we're ready to do some bokeh magic! The thing to remember is to do this in steps. Add a bit of bokeh at a time and see where you want to stop. Not all images must be all glitter, some might need much fewer editing than others. For some you might want to use softer bokeh (meaning more blur or lower opacity), for others you might need it to be sharper. Also, keep in mind that bokeh is usually seen on lighest parts of the photo, since bokeh is actually blurred light. So keep your bokeh brush on the lightests parts of your image (see how I'm mostly using the brushes over the same spots below). And don't brush bokeh over the doll itself. At least for starters. It might give a nice lense flare type of effect, but try that out when you're more familiar with this. You can brush over the edges of the subject (like I've done below), but try to use it minimally. Ok? Let's go!
Now the reason I went with pink for this photo? It makes it easier to choose complimenting bokeh colours. :P You should choose colours that would make some sense for the light of your picture. So here I've gone with #f5d7e6 for Foreground and #aba4ac for Background. If I had gone with a purely white toned image I would have chosen a very light grey and perhaps a light yellow. You can try choosing colours by picking actual colours from your image with the Eyedropper tool, but bear in mind that you might want to choose a bit darker tones.
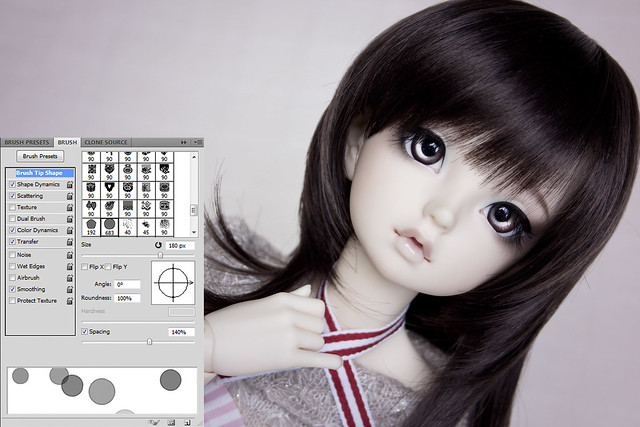
Then for the brush itself. I've selected the newly made Bokeh Circle Brush. Mostly it is the same setting as we did with the snowflake tutorial, I've set: Spacing to 140%, Size jitter to 40% and Opacity jitter to 60%. Then for a new thing I've gone to Color Dynamics setting and set Foreground/background jitter to 100% and all of the Hue, Saturation and Brightness jitters to 10%, keeping Purity in 100%.
This time I have not chosen Scatter at all, since I want to have a better control where the bokeh is.
I've started to build up the bokeh from lowest to the top. For the large undertones I've chosen a largish brush of 180px size. I've made dots around both of her ears, partly overlapping the hair. Make sure to have some of the dots overlapping each other! I then set this layer's blending mode to Overlay, used a Gaussian Blur of 10px and turned down the opacity to 50%.

Then I do the main bokeh layer using 80px brush with all the same other settings. I add dots to the lightests parts. Note that I fill a much smaller area than with the largest brush. It is meant to be a mere effect here, after all. This layer I haven't blurred at all, but I've turned the blending to Overlay and Opacity to 63%.

Now for a bit of glitter I do another layer with an even smaller 40px brush. For this I used a 2px Gaussian Blur and then it's set to Overlay again. I didn't need to lower the opacity for this one.

Then add some more glitter with the hexagon bokeh. This time I used a 50px brush and added Scattering of 250% to make it more random. I also lightened the colours bit, using #ffeaf9 and #dfd9e1. I swoshed a wider area this time. Then Gaussian blur 2ox, set to Overlay and Opacity 75%.
[Edit. I seem to have actually forgotten to use Rotate jitter on my polygon bokeh... I usually use a 100% jitter so that the hexagons don't face the same way.]
And finally to spread out the hexagons I used a 100px brush with the same Scattering. I used a heavier Gaussian Blur of 4px, set to Overlay again and Opacity 40%. And now I'm done.
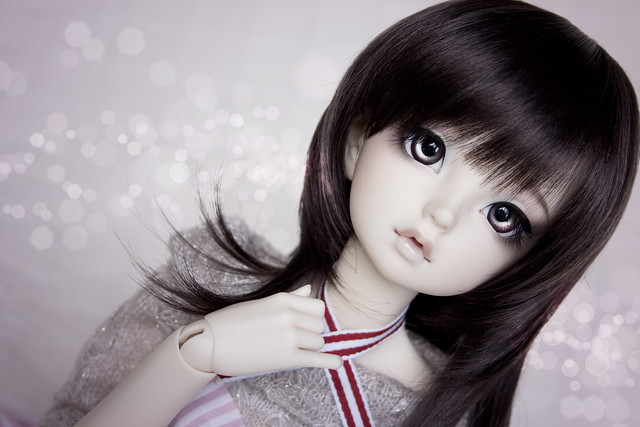
So the gist of it is using different size brushes that make overlapping shapes and then turning each of them to Overlay mode. Using colours complimenting the original image and lowering opacity and blurring makes the effect soft and dreamy. I'll go over the darker images too in another tutorial, but I'll do a spoiler right away and tell that Overlay blending mode is the key there as well ;)
And here's the final, watermarked photo:


Nice tutorial, it's a very good example on how to build the layers up for a nice effect. Thanks for sharing!
VastaaPoistaThanks for reading :) Yes the important thing about many edits is building it up. It is also the secret behind photoshop painting, but for those I somehow never seem to get it myself and just get furious since the colours won't blend like I an them to XD Perhaps doing an entire panting would be too much of a strain on my patience after all... A photo edit is done in minutes, after all.
VastaaPoista